This is default featured slide 1 title

Go to Blogger edit html and find these sentences.Now replace these sentences with your own descriptions.

This is default featured slide 2 title

Go to Blogger edit html and find these sentences.Now replace these sentences with your own descriptions.

This is default featured slide 3 title

Go to Blogger edit html and find these sentences.Now replace these sentences with your own descriptions.

This is default featured slide 4 title

Go to Blogger edit html and find these sentences.Now replace these sentences with your own descriptions.

This is default featured slide 5 title

Go to Blogger edit html and find these sentences.Now replace these sentences with your own descriptions.

Wednesday, June 7, 2017

Heartfelt Creations

Products Used
Designer Dries White Adhesive 159951
Scor-Tool368771
Botanical Wings DieHCD1-758
Botanical Rose Cling Stamp SetHCPC-3651
Peacock Paisley Paper CollectionHCDP1-252
Deluxe Flower Shaping KitHCST1-401
Scor-Pal Measuring & Scoring Board173842
Stack and Store Daubers-Pack of 6HCDA1-449
Rajni Chawla's Frosting PowderPGM15016

Other Products: SA Crafters Postage Frame Box, Memento Navy Ink, Scrapiniec Embellishment, Birdcage Kaisercraft, Liquitex White Gesso, Beaded Flower Center, Westcott Brand Trimmer & Scissors, Craft Knife, Craft File, Stamen
Watch tutorial in the link to see how to shape the botanical rose: https://www.youtube.com/watch?v=0Qcx0tuQ0iQ.
Instructions: Take your peacock paisley paper and cut to size matching the various pieces of the postage stamp shadow box kit pieces. Once done adhere all the pieces using your adhesive to form the postage stamp shadow box. Once complete you can take your craft file and file down and frayed or left over edges to get a smooth finished look. Next you will use your Memento ink in navy with your dauber to sponge some color onto the birdcage and "embrace" sentiment also adding a touch of white gesso for a vintage look. 
   
Now take your botanical rose die in the large and medium size and die cut 4 large and 4 medium and 2 small cuts. Each layered flower will have 2 layers.  Use your flower shaping embossing tool to shape the flowers before gluing the layers together.  Be sure to ink the edges with your memento navy ink as well as adding touches of white gesso to the edges. The large flowers will have beaded centers and the 2 smaller flowers will use one flower stamen for the center.  Arrange your flowers as desired while you add your birdcage and flower. 

I hope everyone enjoyed mypost and thanks for stopping by!!

Thursday, June 1, 2017

Whose Birthday

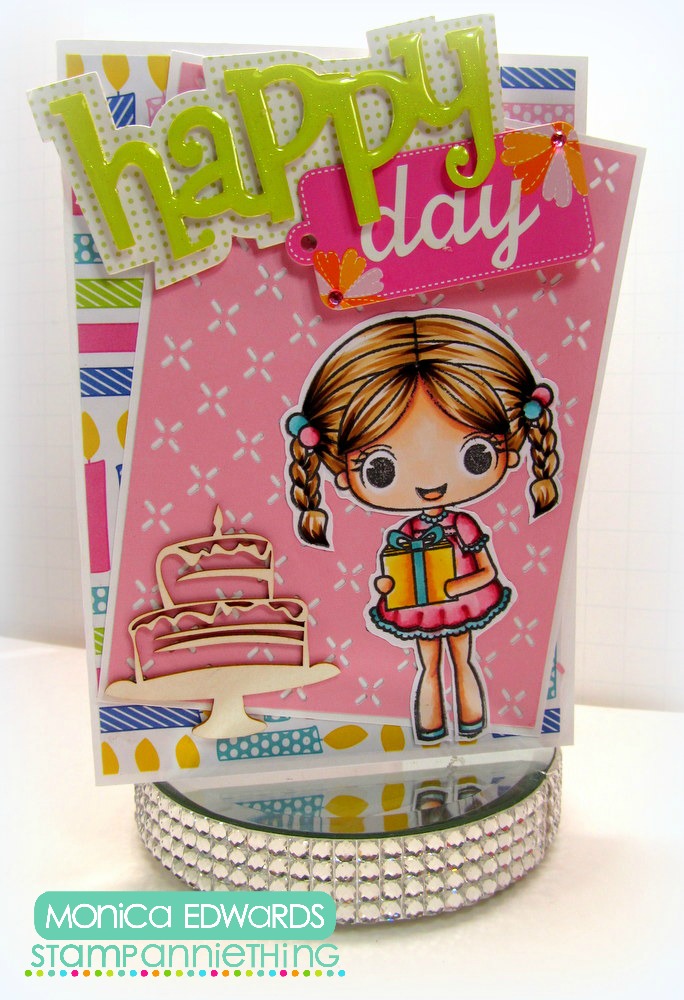
Hi everyone!  I am back with another fun Stamp Annie Thing design and just a quick funny story to show you how brain dead I can be.  I literally just got the gist behind the name "Stamp Anything" "Stame Annie Thing" too cute I must admit Ann!!
birthday card.jpg
Anyhoo this cutie pie is "Lorelei" for
How to Play Along:
- Create a new project with a Birthday Theme.
-Share your creation at Our Facebook Group HERE by June 9, 2017
-Only one entry
-A Stamp of your choice will be awarded to the winner, if we have five or more entries.
Have a wonderful week! Join us tomorrow for another Birthday Card Idea. 

Wednesday, May 31, 2017

Ombre Petunia

Products Used
Designer Dries White Adhesive 159951
Scor-Tool368771
Memento Dye Ink Pad - Tuxedo BlackTSMP900
Scor-Pal Measuring & Scoring Board173842
Flower Shaping EssentialsHCST2-406
Eyelet Oval DieHCD1-776
Regal Borders and Pockets DieHCD1-779
Stack and Store Daubers-Pack of 6HCDA1-449
Classic Petunia Bouquet Cling Stamp SetHCPC-3787
Classic Petunia Paper CollectionHCDP1-278
Rajni Chawla's Frosting PowderPGM15016

Instructions


Other Products: XPRESS-it Blending Card, Spellbinders Wizard, Craft Knife, Helmar Foam Dots, Doddlebug Sprinkles, Making Memories Distressing Tool, Elmer's Spray Glue, Copic Sketch: YG00, YG03, YG05, YG17, YG67, RV63, RV66, RV69, RV02, RV04, RV06, C6, Classic Neenah White Cardstock, Westcott Brand Paper Trimmer, Washi Tape, Black Paint Pen


Instructions: Take your white cardstock and using your scor-tool, score at 6 1/4". Then you will cut the paper at 6.25 so your card measure 6.25 x 6.25". Take your regal border die and place it along the edge of your card to cut a fancy edge. This will be done on both sides of the card where it opens. Use two pieces of washi tape to hold the die in the place. This will ensure you get the same cut on both edges of your paper. 
Next cut your classic petunia patterned paper to 4.5 x 4.5" for your card front and adhere it to your scored white cardstock with some designer dries white adhesive.
Take your stamp from the Petunia Bouquet set stamp using memento tuxedo black ink on XPRESS-it blending card and diecut it using the Eyelet oval die. Color the image using Copic Sketch markers. Color the Leaves: YG00, YG03, YG05, YG17, YG67 now color the flowers with C6. Stamp the same image on another piece of blending card and color the Flowers: RV02, RV04, RV06 for the bigger flowers: RV63, RV66, RV69 these you will fussy cut each individual flower. Once complete use your shaping tool and shape each flower. Color the outer edge with your black paint pen. Layer the fussy cut flowers onto the white oval using foam dots on each flower, this will allow each flower to have a 3D look. 

  
Now take your eyelet oval die and diecut using the decorative edge die with the classic petunia paper. Adhere your white oval onto green oval layer and adhere to your card. Add a sentiment from classic petunia collection to the complete the card.

Hope you enjoyed my post and thanks for stopping BY!

Saturday, May 27, 2017

Creating with Copics


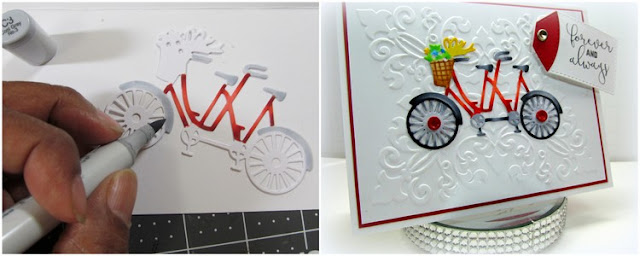
Welcome back to my Saturday post for Tutti Designs I am using the "Tandem Bike" for my post today  A fun versatile die that you can use for anything,
 
Have fun with your die cuts by coloring them with your copic markers as seen below.

I used Copics to do something different than the usual paper piecing. 
Colors used: R22, R24, R27, R29, E44 C3, C5, C7, C9, 100

I then embossed the paper with a celtic sort of look the fancy the card up.  Next I stamped a sentiment and put it on a tag sort of like a flag you would have flying off the back of your bike back in the old days.... lol

Here is a close up of my colored bike and I hope everyone likes it, Now be sure to take time out to visit all the Tutti links provided for you below:


Friday, May 26, 2017

Dream Big plaque


Under the Sea Collection - Wall Plaque

Heartfelt Creations Products & Products Carried by HC:
HCCE1-612 : Under The Sea Creative Essentials
HCD1-776 Eyelet Oval

Other Products Used:
Neenah White Cardstock
Distress Ink: Ripe Persimmon
Scrapiniec : Dream Big Sentiment
Wood Wall Plaque
Tombow Mono Adhesive Glue
Flatback Pearls - White
Craft Knife
Helmar Foam Dot

 Instructions:


Take your patterned paper and adhere it to the wall plaque using your Tombow mono adhevvie glue. Once dry use your craft knife to cut any excess paper from the plaque.  Use your eyelet oval and die cut using the coordinating patterned paper.  
 Take your foam dot and adhere it to the 2nd layer from the eyelet oval set.  Fussy cut 5 flowers from Under the Sea patterned paper.  Once done using your riper persimmon distress ink to color the sentiment which will be the focal point of the plaque
I hope everyone has enjoyed my post and thanks for stopping by feel free to leave a comment

Saturday, May 20, 2017

Wedding Card

Hi crafters! Welcome Mr. and Mrs. and new die from Tutti Designs  - April release.
A perfect centerpiece die for weddings, anniversary's, engagements you name it.  I embossed the black cardstock with mini dots embossing folder and matted it over some paper from Cutcardstock.

 I then made some mini flowers using a punch ha I totally forgot I had so many Punch Bunch punches laying around - time to break them out again!
I hope everyone enjoyed my post and thanks for stopping by and don't forget we have all kinds of links for your inspiration: 

Thursday, May 18, 2017

Stamp Annie Thing


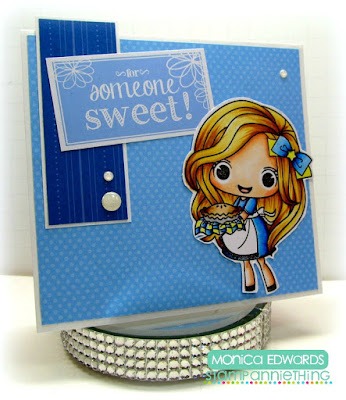
Hi crafters! Today I am here to share my card for Stamp Annie Thing using "Liberty-Sweetie Pie"! That pie is looking really yummy isn't it?!!

 She is colored with copics on Xpress-IT paper which is my go to paper for using copics.  The background paper is from Creative Memories it is actually an older set, but I will always be a die hard CM fan for life!


I hope everyone enjoyed my post thanks for stopping by!